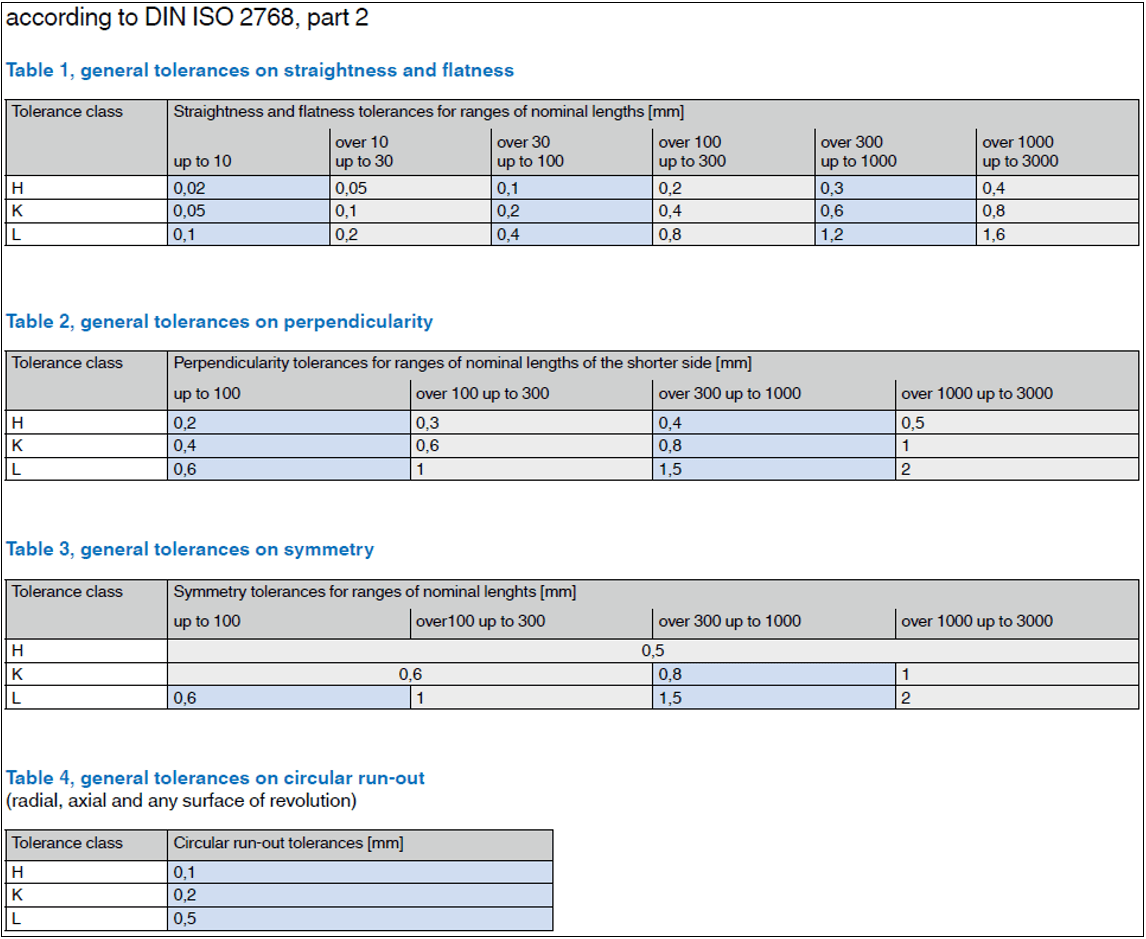
It should be noted that parts with too thin walls, made of materials with low strength, can have an impact on the manufacturing process. The workpiece can warp, wherby the defined position tolerances can not be guaranteed or simply can not be produced.
Tolerances & Technical
Internal thread plain / with surface coating: Tolerance 6-H
External thread plain: Tolerance 6-g
External thread with surface coating: Tolerance 6-h
Execution optionally cut, turned, grooved, rolled, milled or whirled
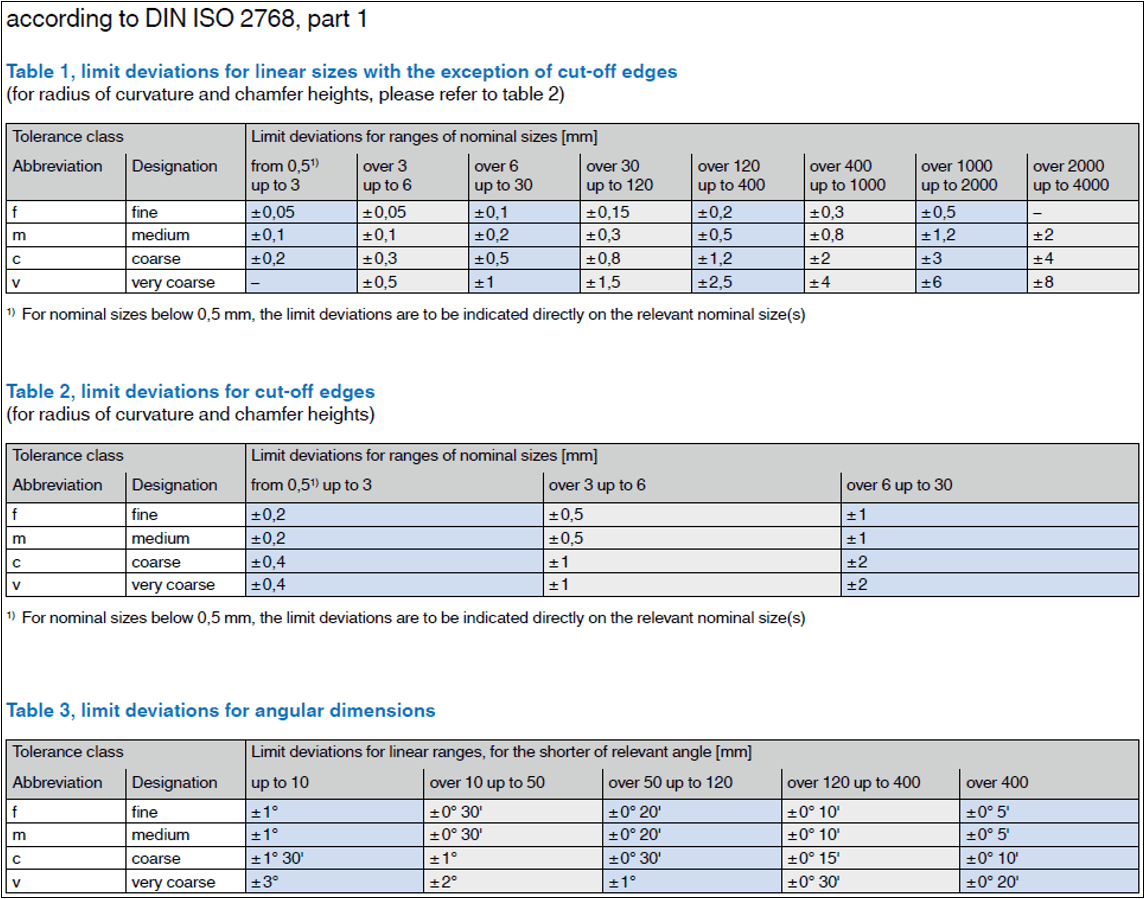
We manufacture according to ISO 2768. Fine: ISO 2768-fH / Medium: ISO 2768-mk / Coarse: ISO 2768-cl. Select the tolerance field based on the narrowest tolerance of the product. If no technical drawing is available production is carried out according to the defined ISO 2768 tolerance range. Additional requirements contained in the drawing are considered for production. Significant deviations or other additional requirements can affect the production and the calculated price. For drives, screw heads and screw lengths, the tolerances are according to ISO 4759 or the respective, corresponding product standard.


To all non-dimensioned workpiece edges the following tolerances apply: Outer edges - 0.2 mm / inner edges + 0.4 mm, see DIN ISO 13715.
Edge descriptions such as "sharp-edged free of burrs", "sharp-edged" and "free of burrs" are assumed to be according to DIN 6784 ±0,05 mm, meaning there may be both a minimal material removal and minimal burr.
For example, cross drilled holes can have a burr of max +0.1 mm. If a free of burrs drill hole transition is required, the chamfer size is not defined.
CNC production achieves surface roughnesses of Ra 1.6 (N7) for turning and milling parts. If a finer surface roughness is required, this can be achieved by additional processing steps such as grinding or polishing.
Basically, the goal is to achieve zero defects. In series production, the product quality is checked by spot checks, unless a 100% inspection has been explicitly agreed. The process capability should be able to be demonstrated using the usual statistical methods. It is pointed out that a slight error rate may have to be expected when using statistical methods for determining the part quality.
All workpieces are commercially cleaned. Parts made of low-alloy materials are lightly preserved before shipping. Unless otherwise defined, turning parts can have rotary burrs on their end faces (flat surfaces). This also applies to general processing characters in or on the title block. The burr size is measured according to DIN 6785 (total length measured over the burrs, must be within the permissible tolerance).

